目次
SDカードに root filesystem を作成する (Obsolete)
ブートローダーでの操作 で、SD カードに作成した Debian を root filesystem として起動する方法を紹介しました。
ここでは、SD カードに root filesystem を作成する方法を紹介します。実機での作業例となります。
準備
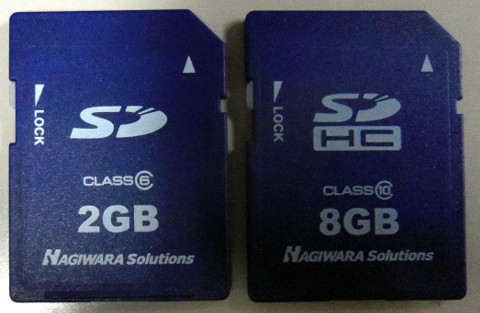
適当な容量の SD カードを用意します。
開発に使う場合、市販の安価な製品 (MLC) ではなく、書換可能回数が多い SLC の製品を使用するほうが良い1)と思います。
※ SLC の SD カードは、弊社でも販売しております。お問い合わせは こちら からお願い致します。
SD カードのフォーマット
fdisk, mkfs.ext4 コマンドにより、
- パーティションの作成
- ファイルシステムの作成
を行います。
パーティションの作成
新品の SD カードは、VFAT フォーマットになっており、パーティションの ID も “FAT” になっているため、
fdisk コマンドで パーティション ID を “Linux” に変更します。
user1@plum:~$ sudo fdisk /dev/mmcblk0
[sudo] password for user1:

Command (m for help): t
Selected partition 1
Hex code (type L to list codes): 83
Changed system type of partition 1 to 83 (Linux)

Command (m for help): p

Disk /dev/mmcblk0: 2002 MB, 2002780160 bytes
77 heads, 26 sectors/track, 1953 cylinders, total 3911680 sectors
Units = sectors of 1 * 512 = 512 bytes
Sector size (logical/physical): 512 bytes / 512 bytes
I/O size (minimum/optimal): 512 bytes / 512 bytes
Disk identifier: 0x00073ed7

        Device Boot      Start         End      Blocks   Id  System
/dev/mmcblk0p1   *        2048     3908608     1953280+  83  Linux

Command (m for help): w
The partition table has been altered!

Calling ioctl() to re-read partition table.

WARNING: If you have created or modified any DOS 6.x
partitions, please see the fdisk manual page for additional
information.
Syncing disks.
user1@plum:~$
ファイルシステムの作成
ext4 ファイルシステムを作成します。
inode の数が不足することがありますので、“-i 4096” オプションを付与しておきます。
user1@plum:~$ sudo mkfs.ext4 -m 0 /dev/mmcblk0p1 -i 4096
mke2fs 1.42.9 (4-Feb-2014)
Discarding device blocks: done
Filesystem label=
OS type: Linux
Block size=4096 (log=2)
Fragment size=4096 (log=2)
Stride=0 blocks, Stripe width=0 blocks
488400 inodes, 488320 blocks
0 blocks (0.00%) reserved for the super user
First data block=0
Maximum filesystem blocks=503316480
15 block groups
32768 blocks per group, 32768 fragments per group
32560 inodes per group
Superblock backups stored on blocks:
	32768, 98304, 163840, 229376, 294912

Allocating group tables: done
Writing inode tables: done
Creating journal (8192 blocks): done
Writing superblocks and filesystem accounting information: done

user1@plum:~$
SD カードのマウント
フォーマットが完了しましたので、適当なディレクトリ (例: /mnt/sd) に mount しておきます。
user1@plum:~$ sudo mount /dev/mmcblk0p1 /mnt/sd/
user1@plum:~$ df /mnt/sd/
Filesystem     1K-blocks  Used Available Use% Mounted on
/dev/mmcblk0p1   1798244  2880   1778980   1% /mnt/sd
user1@plum:~$
root filesystem の作成
オンボードフラッシュメモリで採用しているのと同じ “Ubuntu Linux” の root filesystem を作成してみます。
Ubuntu を含む Debian 系のディストリビューションの場合、“debootstrap” コマンドで作成することができます。
debootstrap のインストール
まずは、debootstrap コマンドをインストールします。
user1@plum:~$ sudo apt-get update
Ign http://ports.ubuntu.com trusty InRelease
Ign http://ppa.launchpad.net trusty InRelease
Ign http://ports.ubuntu.com trusty-updates InRelease
Hit http://ppa.launchpad.net trusty Release.gpg
Ign http://ports.ubuntu.com trusty-security InRelease
Hit http://ppa.launchpad.net trusty Release
Hit http://ports.ubuntu.com trusty Release.gpg
Hit http://ppa.launchpad.net trusty/main armhf Packages
Hit http://ports.ubuntu.com trusty-updates Release.gpg
Hit http://ppa.launchpad.net trusty/main Translation-en
Hit http://ports.ubuntu.com trusty-security Release.gpg
Hit http://ports.ubuntu.com trusty Release
Hit http://ports.ubuntu.com trusty-updates Release
Hit http://ports.ubuntu.com trusty-security Release
Hit http://ports.ubuntu.com trusty/main armhf Packages
Hit http://ports.ubuntu.com trusty/restricted armhf Packages
Hit http://ports.ubuntu.com trusty/universe armhf Packages
Hit http://ports.ubuntu.com trusty/main Translation-en
Hit http://ports.ubuntu.com trusty/restricted Translation-en
Hit http://ports.ubuntu.com trusty/universe Translation-en
Hit http://ports.ubuntu.com trusty-updates/main armhf Packages
Hit http://ports.ubuntu.com trusty-updates/restricted armhf Packages
Hit http://ports.ubuntu.com trusty-updates/universe armhf Packages
Hit http://ports.ubuntu.com trusty-updates/main Translation-en
Hit http://ports.ubuntu.com trusty-updates/restricted Translation-en
Hit http://ports.ubuntu.com trusty-updates/universe Translation-en
Hit http://ports.ubuntu.com trusty-security/main armhf Packages
Hit http://ports.ubuntu.com trusty-security/restricted armhf Packages
Hit http://ports.ubuntu.com trusty-security/universe armhf Packages
Hit http://ports.ubuntu.com trusty-security/main Translation-en
Hit http://ports.ubuntu.com trusty-security/restricted Translation-en
Hit http://ports.ubuntu.com trusty-security/universe Translation-en
Reading package lists... Done
user1@plum:~$
user1@plum:~$ sudo apt-get install debootstrap
Reading package lists... Done
Building dependency tree
Reading state information... Done
The following NEW packages will be installed:
  debootstrap
0 upgraded, 1 newly installed, 0 to remove and 2 not upgraded.
Need to get 30.0 kB of archives.
After this operation, 233 kB of additional disk space will be used.
Get:1 http://ports.ubuntu.com/ubuntu-ports/ trusty-updates/main debootstrap all 1.0.59ubuntu0.2 [30.0 kB]
Fetched 30.0 kB in 0s (34.3 kB/s)
Selecting previously unselected package debootstrap.
(Reading database ... 20175 files and directories currently installed.)
Preparing to unpack .../debootstrap_1.0.59ubuntu0.2_all.deb ...
Unpacking debootstrap (1.0.59ubuntu0.2) ...
Setting up debootstrap (1.0.59ubuntu0.2) ...
localepurge: Disk space freed in /usr/share/locale: 0 KiB
localepurge: Disk space freed in /usr/share/man: 0 KiB

Total disk space freed by localepurge: 0 KiB

user1@plum:~$
root filesystem の作成
debootstrap コマンドにより作成します。
user1@plum:~$ sudo debootstrap trusty /mnt/sd http://ports.ubuntu.com/
I: Retrieving Release
I: Retrieving Release.gpg
I: Checking Release signature
I: Valid Release signature (key id 790BC7277767219C42C86F933B4FE6ACC0B21F32)
〜〜〜 中略 〜〜〜
I: Configuring eject...
I: Configuring perl...
I: Configuring libpod-latex-perl...
I: Configuring init-system-helpers...
I: Configuring liblog-message-simple-perl...
I: Configuring libtext-soundex-perl...
I: Configuring libarchive-extract-perl...
I: Configuring libterm-ui-perl...
I: Configuring libmodule-pluggable-perl...
I: Configuring rsyslog...
I: Configuring kbd...
I: Configuring ubuntu-minimal...
I: Configuring libc-bin...
I: Configuring initramfs-tools...
I: Base system installed successfully.
user1@plum:~$
/mnt/sd 以下に、下記のとおり root filesystem が作成されました。
user1@plum:~$ ls -l /mnt/sd/
total 88
drwxr-xr-x  2 root root  4096 Nov 13 17:01 bin
drwxr-xr-x  2 root root  4096 Apr 11  2014 boot
drwxr-xr-x  3 root root  4096 Nov 13 16:59 dev
drwxr-xr-x 61 root root  4096 Nov 13 17:02 etc
drwxr-xr-x  2 root root  4096 Apr 11  2014 home
drwxr-xr-x 12 root root  4096 Nov 13 17:00 lib
drwx------  2 root root 16384 Nov 13 15:42 lost+found
drwxr-xr-x  2 root root  4096 Nov 13 16:57 media
drwxr-xr-x  2 root root  4096 Apr 11  2014 mnt
drwxr-xr-x  2 root root  4096 Nov 13 16:57 opt
drwxr-xr-x  2 root root  4096 Apr 11  2014 proc
drwx------  2 root root  4096 Nov 13 16:57 root
drwxr-xr-x  7 root root  4096 Nov 13 17:00 run
drwxr-xr-x  2 root root  4096 Nov 13 17:02 sbin
drwxr-xr-x  2 root root  4096 Nov 13 16:57 srv
drwxr-xr-x  2 root root  4096 Mar 13  2014 sys
drwxrwxrwt  2 root root  4096 Nov 13 17:02 tmp
drwxr-xr-x 10 root root  4096 Nov 13 16:57 usr
drwxr-xr-x 11 root root  4096 Nov 13 16:57 var
user1@plum:~$
root filesystem の設定
root filesystem は作成されましたが、実際に使用するためには各種設定が必要となります。
例として、下記設定が必要です。
- Kernel module のコピー
- root のパスワード
- fstab
- console (getty)
- apt source
Kernel module のコピー
今動作している Kernel 用の module 一式を、SD カードにコピーしておきます。
debootstrap で作成した root filesystem には、/lib/modules ディレクトリが作成されていないため、作成しておきます。
user1@plum:~$ sudo mkdir /mnt/sd/lib/modules
user1@plum:~$
その後、Kernel module のディレクトリ以下をコピーします。
user1@plum:~$ sudo cp -a /lib/modules/3.14.23+ /mnt/sd/lib/modules/
user1@plum:~$
root のパスワード設定
root のパスワードを設定します。
user1@plum:~$ sudo chroot /mnt/sd/
root@plum:/# passwd
Enter new UNIX password:
Retype new UNIX password:
passwd: password updated successfully
root@plum:/# exit
exit
user1@plum:~$
fstab の設定
debootstrap 直後は、下記のとおり全く設定されていません。
user1@plum:~$ cat /mnt/sd/etc/fstab
# UNCONFIGURED FSTAB FOR BASE SYSTEM
user1@plum:~$
下記のようにエディタを起動し、設定しておきます。
user1@plum:~$ sudo nano -w /mnt/sd/etc/fstab
console(getty) の設定
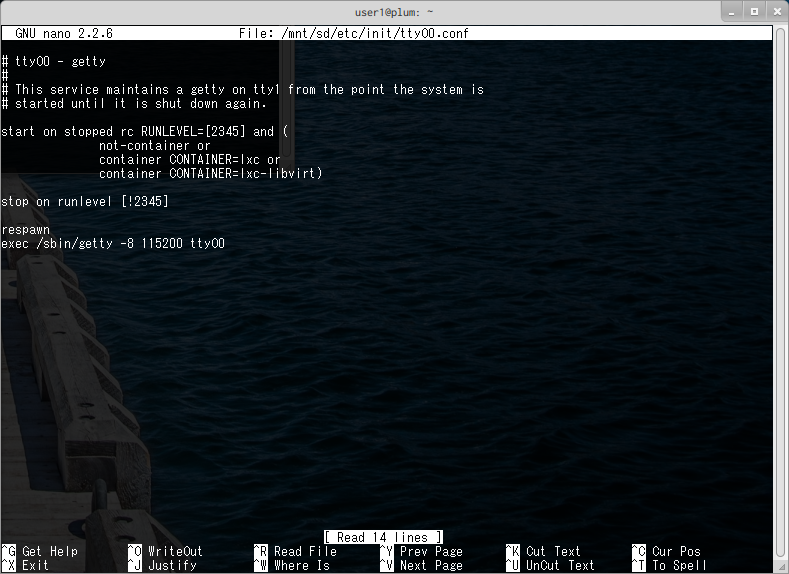
シリアルコンソールでログインできるよう、getty の設定をしておきます。
/etc/init/ttyO0.conf をベースにして編集します。
user1@plum:~$ sudo cp /etc/init/ttyO0.conf /mnt/sd/etc/init/
user1@plum:~$ sudo nano -w /mnt/sd/etc/init/ttyO0.conf
※ 上の例は、RJ-45 のポートをコンソールとして使用する場合です。DSUB-9 を使用する場合は、ttyO0 → ttyO1 と読み替えてください。
apt source の設定
apt-get でパッケージ追加・更新ができるように、apt source の設定をしておきます。
オンボード Flash の設定をそのままコピーで良いと思います。
user1@plum:~$ sudo cp /etc/apt/sources.list /mnt/sd/etc/apt/
user1@plum:~$
SD root filesystem からの起動
Bootloader のシェルから、Kernel command line を設定して起動します。
UBI: user volume: 10, internal volumes: 1, max. volumes count: 128
UBI: max/mean erase counter: 2/0, WL threshold: 4096, image sequence number: 27632
UBI: available PEBs: 0, total reserved PEBs: 2040, PEBs reserved for bad PEB handling: 40

Hit m for menu or any other key to stop autoboot:  2

type exit to get to the menu
barebox@plum-ma[512MiB]:/ global.linux.bootargs.dyn.root="root=/dev/mmcblk0p1 rootfstype=ext4 rootwait"
barebox@plum-ma[512MiB]:/ bootm /dev/ubi0.kernel.0 -o /dev/spi.dtb.0
   Image Name:   Linux-3.14.23+
   Created:      2014-11-11   4:54:32 UTC
   OS:           Linux
   Architecture: ARM
   Type:         Kernel Image
   Compression:  uncompressed
   Data Size:    3468368 Bytes = 3.3 MiB
   Load Address: 80008000
   Entry Point:  80008000

Loading OS U-Boot uImage '/dev/ubi0.kernel.0'
〜〜〜
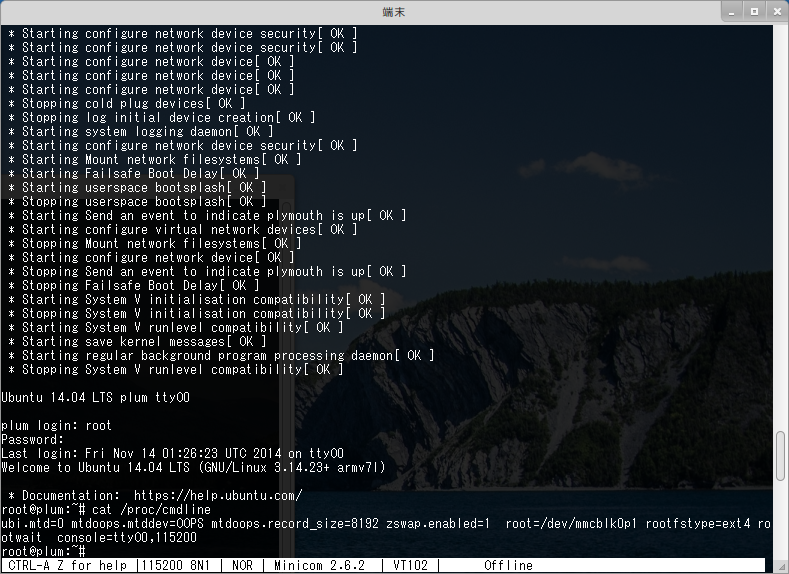
起動しました。
この後は、
- Network の設定 (/etc/network/interfaces)
- 一般ユーザアカウントの追加
- パッケージの追加・更新・削除
などを行って、好みの環境を作ることができます。
ダウンロード
今回、v2.4.0 ファームウェアの環境で作成したサンプルを置いておきます。
| File | Stat | SHA1SUM | Info |
|---|---|---|---|
| trusty_v2_4_0_sdroot.tar.xz | 2014/11/14 11:08 77.9 MB | 66231a2cfec06ad61228e0e11339c3d2f3ac32c2 | v2.4.0 用 |


