目次
開発環境用仮想マシンのセットアップ (Obsolete)
MA-E3xxシリーズは、Ubuntu Linuxを採用していますので、クロス開発を行うにもUbuntu Linuxを使用すると便利です。
仮想化ソフトウェアには、VMware/VirtualBox/Parallels/KVM などがありますが、ここでは例としてVirtualBoxを使用します。
Bash on Ubuntu on Windows での開発について
Windows10 で、Bash(Ubuntu 14.04LTS環境) が動作するようになりました。
この環境で開発できるかと思いましたが、binfmt-support が動作せず、QEMU-static による ARM 環境のエミュレーションが動作しないため、
現状は Windows では仮想マシン上に Linux をインストールする必要があります。
root@Win:~$ sudo dpkg-reconfigure binfmt-support
initctl: Unable to connect to Upstart: Failed to connect to socket /com/ubuntu/upstart: 接続を拒否されました
runlevel:/var/run/utmp: そのようなファイルやディレクトリはありません
invoke-rc.d: policy-rc.d denied execution of stop.
update-binfmts: warning: binfmt_misc module seemed to be loaded, but no /proc/sys/fs/binfmt_misc directory!  Giving up.
update-binfmts: warning: binfmt_misc module seemed to be loaded, but no /proc/sys/fs/binfmt_misc directory!  Giving up.
update-binfmts: warning: binfmt_misc module seemed to be loaded, but no /proc/sys/fs/binfmt_misc directory!  Giving up.
update-binfmts: warning: binfmt_misc module seemed to be loaded, but no /proc/sys/fs/binfmt_misc directory!  Giving up.
update-binfmts: warning: binfmt_misc module seemed to be loaded, but no /proc/sys/fs/binfmt_misc directory!  Giving up.
update-binfmts: warning: binfmt_misc module seemed to be loaded, but no /proc/sys/fs/binfmt_misc directory!  Giving up.
update-binfmts: warning: binfmt_misc module seemed to be loaded, but no /proc/sys/fs/binfmt_misc directory!  Giving up.
update-binfmts: warning: binfmt_misc module seemed to be loaded, but no /proc/sys/fs/binfmt_misc directory!  Giving up.
update-binfmts: warning: binfmt_misc module seemed to be loaded, but no /proc/sys/fs/binfmt_misc directory!  Giving up.
update-binfmts: warning: binfmt_misc module seemed to be loaded, but no /proc/sys/fs/binfmt_misc directory!  Giving up.
update-binfmts: warning: binfmt_misc module seemed to be loaded, but no /proc/sys/fs/binfmt_misc directory!  Giving up.
update-binfmts: warning: binfmt_misc module seemed to be loaded, but no /proc/sys/fs/binfmt_misc directory!  Giving up.
update-binfmts: warning: binfmt_misc module seemed to be loaded, but no /proc/sys/fs/binfmt_misc directory!  Giving up.
update-binfmts: warning: binfmt_misc module seemed to be loaded, but no /proc/sys/fs/binfmt_misc directory!  Giving up.
update-binfmts: warning: binfmt_misc module seemed to be loaded, but no /proc/sys/fs/binfmt_misc directory!  Giving up.
update-binfmts: warning: binfmt_misc module seemed to be loaded, but no /proc/sys/fs/binfmt_misc directory!  Giving up.
update-binfmts: warning: binfmt_misc module seemed to be loaded, but no /proc/sys/fs/binfmt_misc directory!  Giving up.
update-binfmts: warning: binfmt_misc module seemed to be loaded, but no /proc/sys/fs/binfmt_misc directory!  Giving up.
update-binfmts: warning: binfmt_misc module seemed to be loaded, but no /proc/sys/fs/binfmt_misc directory!  Giving up.
update-binfmts: warning: binfmt_misc module seemed to be loaded, but no /proc/sys/fs/binfmt_misc directory!  Giving up.
initctl: Unable to connect to Upstart: Failed to connect to socket /com/ubuntu/upstart: 接続を拒否されました
runlevel:/var/run/utmp: そのようなファイルやディレクトリはありません
invoke-rc.d: policy-rc.d denied execution of start.
Lubuntuの入手
Ubuntu Linuxそのものでも良いのですが、GUIの使い勝手がWindowsと異なるため、Windowsに慣れているユーザには
Lubuntuのほうが使いやすいと思います。
Lubuntuを公式サイトから入手します。
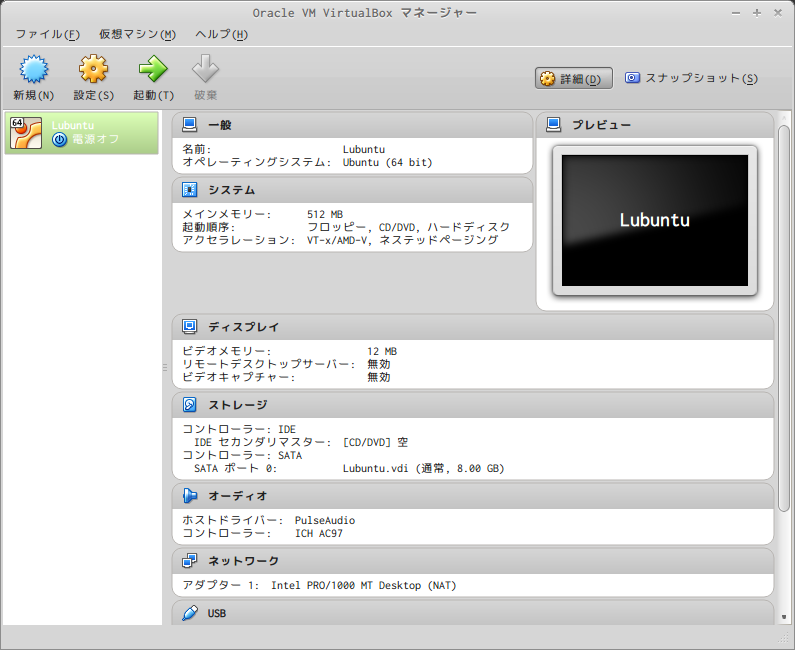
仮想マシンの追加
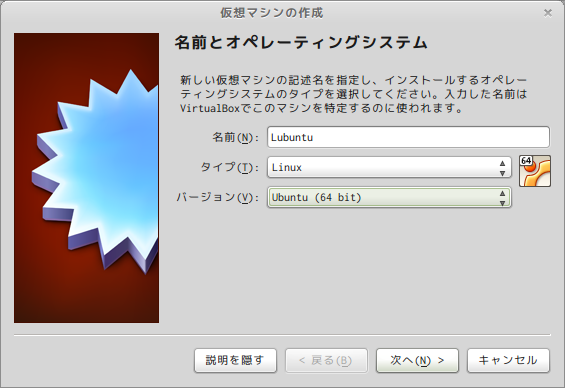
名前とオペレーティングシステム
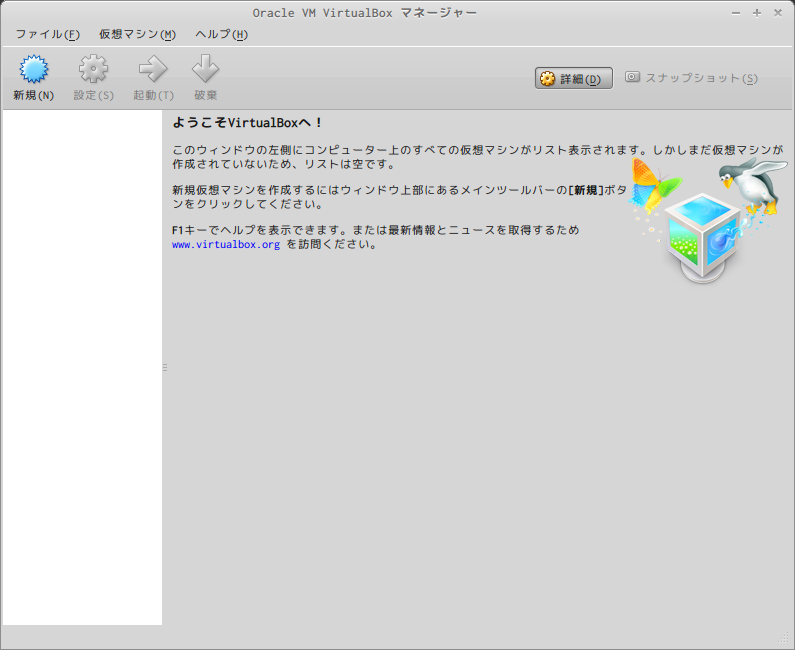
“新規(N)” をクリックし、新規仮想マシンを作成を行います。
名前は “Lubuntu” としています。
“バージョン(V)” は、32bit版を選択した場合は 32bit に変更してください。
設定したら、“次へ(N) >” をクリックして次へ進みます。
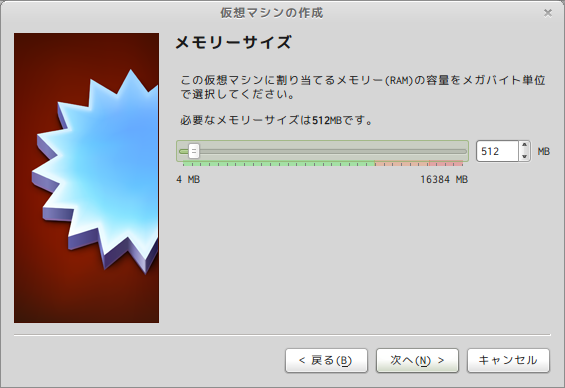
メモリーサイズ
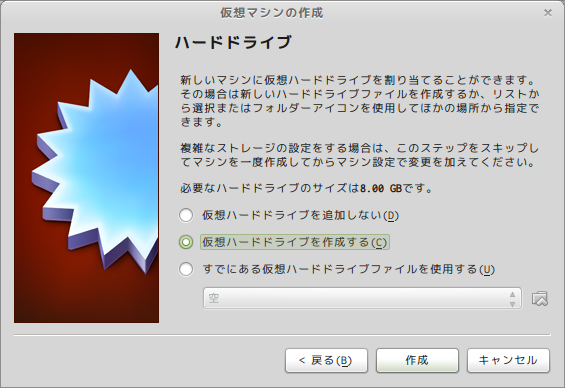
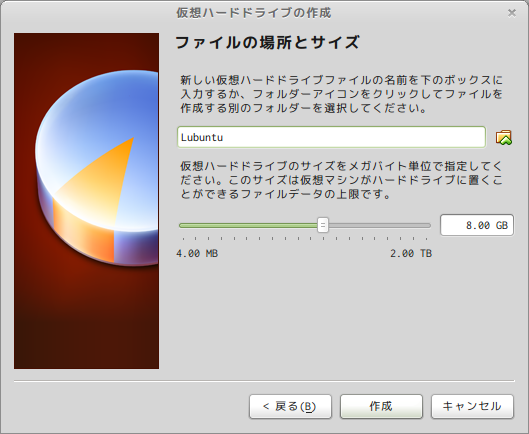
ハードドライブ
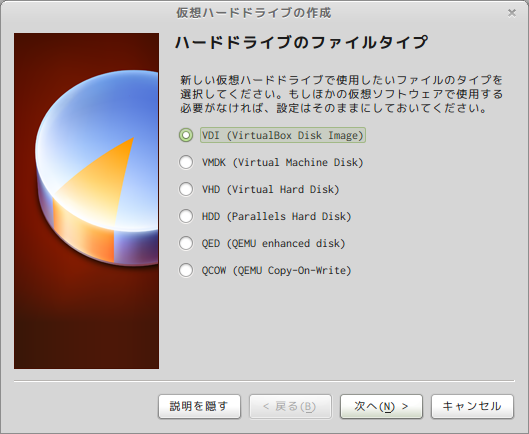
ハードドライブのファイルタイプ
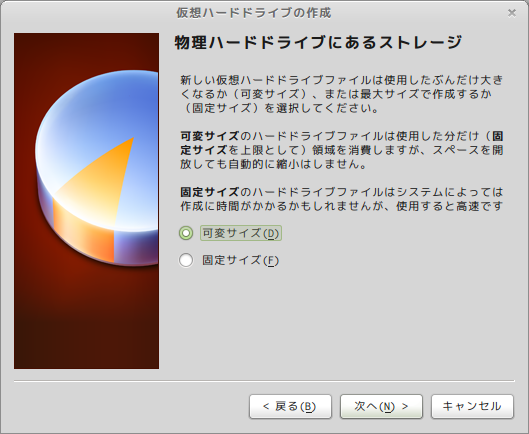
物理ハードドライブにあるストレージ
図の説明のとおりですが、仮想マシンのディスクアクセス速度を重視する場合、“固定サイズ(F)” を選択します。
通常は “可変サイズ(D)” のままでOKです。
“次へ(N) >” をクリックして次へ進みます。
